Grab your favorite tweets in mailbox using - Azure Logic App

Microsoft introduces the new world of simple integration called Logic Apps. One of the most powerful features offered in Azure in order to integrate complex stuff in an easy way. Visual designer to model and automate your process as a series of steps known as a workflow.

Out-of-the-box connectors reduce integration challenges in Microsoft Azure. Connect applications, data, and devices anywhere in the world doesn’t matter they are on-premises or in the cloud. Connectors range includes Salesforce, Office 365, Twitter, Dropbox, Google Services and much more.


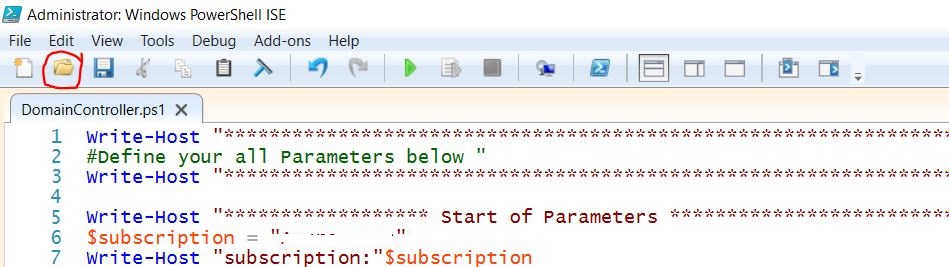
Below article is having steps (Grab your favourite tweets from twitter in your mailbox) with images

1. Login with your credentials on https://portal.azure.com 


2. Search for Logic App


3. Give a Name, Select Subscription, Resource Group and location. In my case since i am New Zealand so close for us is Australia.


4. After you press ok, Logic App will be in deployment process


5. You can see heaps of options but I will select only "When New Tweet is Posted" because we need to catch all favourite tweets


6. Here it required "Sign In" your account


7. Popup will show appear for credentials input


8. Since I need to see all Azure Stack tweets so, my input below is #AzureStack


9. Search for email, you will get no of options including gmail as well, I am selecting outlook.com


10. After you select Email Option will give you prompt about authorization to your email account


11. Fill the fields with your requirements


12. After you give an email submit and you can see the success message as shown below


13. Now from my Twitter account I did tweet with hash tag #AzureStack


14. Next minute email prompted in my mail box :)


15. Here you go, you can see i received the latest tweet :)


Microsoft Azure Cloud Seices ++

Microsoft is increasing Azure Cloud Service speedily. Here I compile services offered by Microsoft which are increasing continuously


Compute
Databases
Service Fabric
Linux Virtual Machines
Virtual Machine Scale Sets
Batch
App Service
Azure Container Service
Cloud Services
Windows Virtual Machines
Azure Container Registry
Functions
SQL Database
DocumentDB
Data Factory
SQL Data Warehouse
Redis Cache
SQL Server Stretch Database
Security + Identity
Networking
Azure Active Directory B2C
Security Centre
Key Vault
Azure Active Directory Domain Services
Multi-Factor Authentication
Azure Active Directory
Security Information
VPN Gateway
Virtual Network
Traffic Manager
Azure DNS
Load Balancer
ExpressRoute
CDN
Application Gateway
Intelligence + Analytics
Developer Tools
Data Factory
Cognitive Services
HDInsight
Data Lake Store
Data Lake Analytics
Analysis Services
Azure Bot Service
Machine Learning
Power BI Embedded
Data Catalog
Stream Analytics
API Management
Visual Studio Team Services
Azure DevTest Labs
HockeyApp
Application Insights
Storage
Internet of Things
StorSimple
Backup
Storage
Site Recovery
Data Lake Store
Machine Learning
IoT Developer Center
Azure IoT Suite
Stream Analytics
Azure IoT Hub
Event Hubs
Notification Hubs
Monitoring + Management
Web + Mobile
Scheduler
Application Insights
Automation
Site Recovery
Log Analytics
Backup
Azure Monitor
Billing
Azure Resource Manager 
Azure Advisor
App Service
API Apps
Web Apps
Mobile Apps
Logic Apps
Media Services
Notification Hubs
CDN
Search
Mobile Engagement
Enterprise Integration


Provisioning Azure VM Using PowerShell

Creating Virtual Machine using PowerShell is quite easy. You just need to replace the parameters. VM required to be placed in proper Resource Group, Storage Account to hold the disks, Virtual Network to identify on network and security stuff, IPs for communication. All these has bundled in one script below

1. In PowerShell use below command in order to connect with Azure

Login-AzureRmAccount


2. Run the below script

How to Join Active Directory in Azure

Given below script is helpful to join Azure Active Directory. Pass the parameters in order to proceed in PowerShell.


Power of Microsoft Cloud – Azure

Another session conducted in College of Advanced Scientific Techniques (CAST) on 10th December for ICT students to aware of Power of Microsoft Cloud – Azure.
Response was huge more than expectations. CAST did more than 175 students, entrepreneurs and teachers registration. Agenda for session was

· What is Microsoft Cloud Computing?
· What Microsoft Azure Cloud?
· How world moving towards Microsoft Cloud?
· Microsoft Cloud Job market situation around the world
· How to start while you are in College/University 
· Tip and Tricks

At end of session there was high tea for audience.


Storage Explorer option in Azure Portal

There are couple of ways in order to interact with Azure Storage i.e using Visual Studio, Azure Portal. But Storage Explorer is very good tool in order to explore the Azure Storage. Here is good news Microsoft updated the Azure Portal by providing option to open with Storage Explorer.


Introduction of Microsoft Cloud Computing

 Introduction of Microsoft Cloud Computing to upcoming final year ICT students is really very important. While I was on vacations in middle east and Pakistan I thought to aware the students about Microsoft Cloud independent of location. I conducted 2 sessions on in College of advanced and scientific techniques CAST and other in Govt. College Sahiwal. There were more than 150+ audience including Final year students and teachers in that session. Special thanks to IT Society of Govt.College Sahiwal who arranged this sessions.
More Online Skype sessions will be conducted as discussed with Head of Computer Department of Govt. College Sahiwal.


Azure - VNet-2-VNet Connectivity Using PowerShell Script

The purpose of this script is to create two Azure Virtual Networks in different Azure regions and then make connectivity between them. PowerShell script will create Virtual Networks, Define Virtual Gateways, Virtual Networks Connections and connectivity between them.


DevOps is not a product to install

It is very important to realize that DevOps is not a product.  You cannot buy DevOps and install it. Thanks to Donovan for clarification. Microsoft Visual Studio is powerful and Complete DevOps Solution.

I tried to sketch diagram and simple definitions of DevOps practices.

Continuous Integration: is basically code merging into Source Control e.g (could be on Prem/Off Prem Microsoft Tools/Services) to make sure upcoming changes with other changes.

Continuous Delivery: is to continuous propagation of code changes on (Test, Pre Production/Staging OR Production).


Continuous Deployment: is code deployment on Production as soon as its ready rather than waiting for other changes and releases.


Build Domain Controller with AD Tenant in 60 minutes - Azure

 “Infrastructure as code” true power of Microsoft Azure Cloud. Here I sketched a single file use to Install a domain controller in Microsoft Azure with provision of an Azure AD Tenant. You need to define all parameters first. All AD Groups, AD Test users, AD Members and AD OUs are present in attached .csv files. I passed the example parameters in script. Script will do following in sequence shown below based on your parameters
·        Storage Account
·        Virtual Network and Subnet
·        Cloud Service
·        Virtual Machine
·        Domain and Tenant

Since i am in New Zealand so, i mentioned my closest Microsoft data center location "Australia East" in script everywhere. Place all files in one folder for example in my case all files residing at location in folder C:\DC\
DC is folder name here, all files with given below names are attached
--------------------------------------------------------------------------------------
File to create domain controller: DomainController.ps1
File to create VNet and Subnet: CreateVNetSubNet.xml
File to create AD Groups: AD_Groups.csv
File to create AD members: AD_Members.csv
File to create AD OUs: AD_OUs.csv
File to create AD Users: AD_Users.csv
--------------------------------------------------------------------------------------

Click here to download all files.


Here are steps to execute scrip with mentioned files.

1. Open PowerShell ISE with Administrator Account 
2. Add-Azure Account as shown below


3. Pass Azure Account Credentials in prompt window


4. Run command Get-AzureSubscription in order to see subscription is valid or not


5. Select the DomainController.ps1 from location C:\DC\ and open in PowerShell


6. Run the script and it will look like below, note script is start executing in sequence


7. Here you can see the progress


8. After completion of above following will be created


9. Click on VM i.e "MyTestVMforAD"


10. Press "Connect" to take session


11. After log-in, go to server administrative tools and click "Active Directory Users and Computers"


12. WOW, domain controller has been provisioned and users imported :)


How to create and apply Network Security Group/Rules Using PowerShell in Azure

What is NSG in Azure?
NSG is the region specific and can be used only within the region specified at creation time.


You can create network security group (NSG) using the PowerShell script. Here are some steps to create and apply NSG

1. Create a new NSG. Since I am in New Zealand and closet data centre for me is "Australia East" so i will use this in example
New-AzureNetworkSecurityGroup -Name "WFE_NSG" -Location " Australia East" -Label "WebFrontEnd NSG in Australia East"

2. Apply the rule to the NSG. Rule will allows all traffic from the Internet
Get-AzureNetworkSecurityGroup -Name "WFE_NSG" | Set-AzureNetworkSecurityRule -Name WEB -Type Inbound -Priority 100 -Action Allow -SourceAddressPrefix 'INTERNET' -SourcePortRange '*' -DestinationAddressPrefix '*' -DestinationPortRange '*' -Protocol TCP

3. Enabling inbound SQL communication
Get-AzureNetworkSecurityGroup -Name "WFE_NSG" | Set-AzureNetworkSecurityRule -Name SQL -Type Inbound -Priority 110 -Action Allow -SourceAddressPrefix '10.0.1.0/24' -SourcePortRange '*' -DestinationAddressPrefix '10.0.2.0/24' -DestinationPortRange '1433' -Protocol TCP

4. Applying Network Security Group (NSG)
Get-AzureVM -ServiceName $service -Name $VM | Set-AzureNetworkSecurityGroupConfig -NetworkSecurityGroupName "WFE_NSG"

5. Apply NSG to a virtual subnet
Get-AzureNetworkSecurityGroup -Name "WFE_NSG" | Set-AzureNetworkSecurityGroupToSubnet -VirtualNetworkName 'MyTestVNet' -SubnetName 'WFE_Subnet'
Get-AzureNetworkSecurityGroup -Name "WFE_NSG" | Set-AzureNetworkSecurityRule -Name RDPIN -Type Inbound -Priority 101 -Action Allow -SourceAddressPrefix 'INTERNET' -SourcePortRange '*' -DestinationAddressPrefix '*' -DestinationPortRange '3389' -Protocol '*'

Awesome MS Ignite 2016 - Auckland New Zealand

Thank you Microsoft for rocking MS Ignite 2016 in New Zealand. It was awesome experience with tech super stars in SkyCity Auckland. I really enjoyed technical sessions most specifically New in OMS, Azure IoT, DevOps, HoloLens last but not least Azure Security.